Page Object Model in action with Pytest - Selenium

We always read or hear about implementing the Page Object Model design pattern in our frameworks, and its benefits. As an advocate for using POM on every Test Automation Project/Framework, I want to share why. The enormous benefits that POM provides, such as improving reusability and avoiding code duplication, are undeniable.
POM is based on creating Pages that model our system under test. One of the biggest challenges in developing end-to-end tests with Selenium is maintainability and flakiness. However, by implementdfajkjkajkdfjakjfakjfing good test design practices, we can significantly mitigate these issues.
Now let’s jump on how to implement it in our framework ⌨️.
Adding Pages
The first step is to create a pages folder in our root directory. This will contain two main files for now (remember, we’re refactoring our code on every blog post 😊).
Inside the pages folder, we’ll create two key files: base_page.py and base_element.py. The first one, base_page.py, will contain the code necessary to initialize the driver and navigate to the URL of our Application Under Test.
We’ll create a go function that utilizes the Selenium webdriver’s get function to navigate to the URL. Our goal is to separate Selenium commands as much as possible from the application’s logic, allowing us to abstract our code in bits later on. This will make maintenance easier and faster.
Here is how it looks:
class BasePage(object):
    url = 'https://the-internet.herokuapp.com/'

    def __init__(self, driver):
        self.driver = driver

    def go(self):
        self.driver.get(self.url)
Now, moving on to the base_page.py file, here we’ll host all the keyword actions functionality, such as:
- Waiting for an element to be available
- Finding and locating elements using explicit waits
- Sending keys (inputting text) in fields
- Clicking on elements
- Returning text
We’ll expand on these features in subsequent code iterations. The purpose of this file is to establish the foundation for our framework, which will manage web elements.
Our BaseElement class will receive two crucial objects: the first one is the driver, representing the webdriver instance set up in the Fixtures methods within the conftest.py file. If you missed that blog post on creating fixtures for Selenium global configuration, please check out Creating Fixtures for Selenium Global Configuration .
The second important object is the locator, which is a tuple. When we try to locate an element with Selenium, we use two elements: a By value and a corresponding selector. The By value indicates the type of selector for Selenium to use, such as:
- ID
- CSS_SELECTOR
- XPATH
Based on this option, we’ll pass a value. This code structure looks like this:"
from selenium.webdriver.support.wait import WebDriverWait
from selenium.webdriver.support import expected_conditions as EC

class BaseElement(object):
    def __init__(self, driver, locator):
        self.driver = driver
        self.locator = locator
        self.web_element = None
        self.find()

    def find(self):
        element = WebDriverWait(self.driver, 10).until(
            EC.visibility_of_element_located(locator=self.locator)
        )
        self.web_element = element
        return None

    def input_text(self, txt):
        self.web_element.send_keys(txt)
        return None

    def click(self):
        element = WebDriverWait(self.driver, 10).until(
            EC.element_to_be_clickable(self.locator)
        )
        element.click()
        return None

    def attribute(self, attr_name):
        attribute = self.web_element.get_attribute(attr_name)
        return attribute

    @property
    def text(self):
        text = self.web_element.text
        return text
The Locator Class
We’re about to add another file to handle our Locator tuple. To make it more manageable and type-safe, we’ll utilize the namedtuple function from Python. This function allows us to create a custom class that represents an immutable data structure, which is perfect for working with collections of related data without creating a full-fledged class.
The locator.py file will be incredibly simple, as it’s mainly used to define our Locator type. Here’s what the code looks like:
from collections import namedtuple

Locator = namedtuple('Locator', ['by', 'value'])
We just need to pass two parameters: by, and value.
Using the BasePage and BaseElement Classes
Great! 🤓, we are ready to start using the base_page, base_element implementation in our application’s pages.
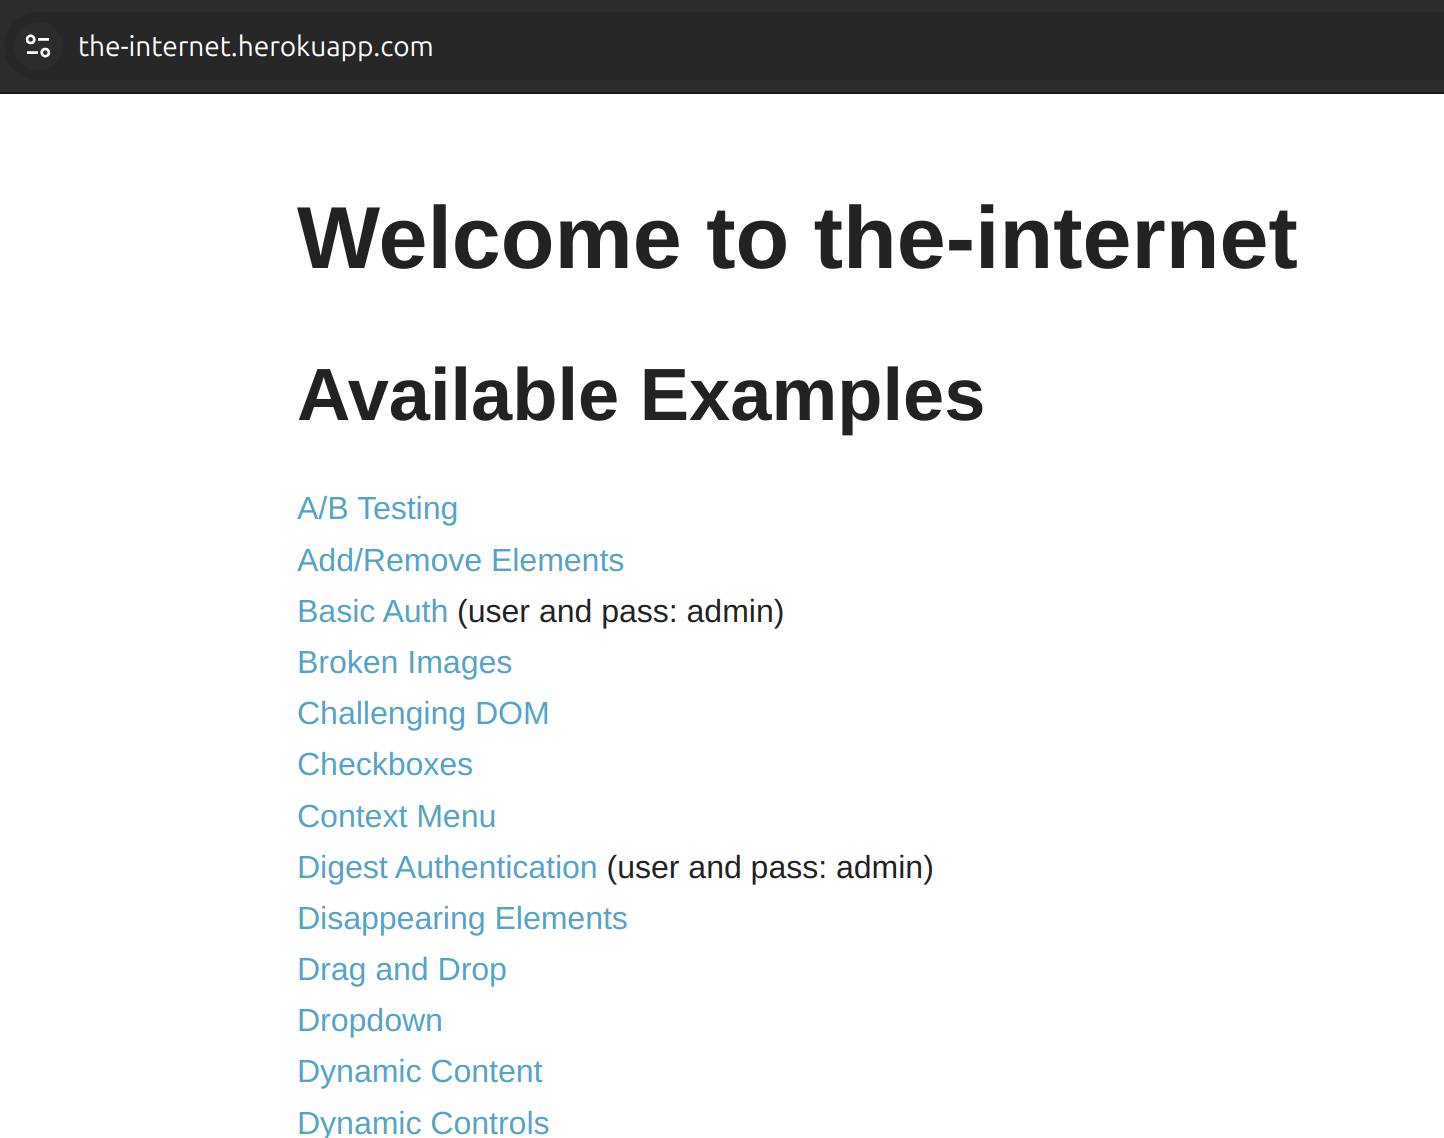
We add another file inside our pages folder with the name ab_testing this corresponds to the first option or link in our Application Under Test:
We will then import the BaseElement, Locator, and the BasePage class, now the AB_TESTING class will extend BasePage class, so we can get all the functions and fields for free.
Finally we are ready to create our functions that will handle the actions we are going to perform to the elements in our AUT ( Application Under Test), the first one will instantiate the object for the A/B Testing Link, the second one will instantiate the element for the header.
The locator variable will be instantiated from the Locator class, that it will return a tuple.
The page’s code will be:
from selenium.webdriver.common.by import By

from .base_element import BaseElement
from .base_page import BasePage
from .locator import Locator


class AB_TESTING(BasePage):

    @property
    def ab_testing_link(self):
        locator = Locator(by=By.CSS_SELECTOR, value="a[href='/abtest']")
        return BaseElement(
            driver=self.driver,
            locator=locator
        )

    @property
    def ab_testing_header(self):
        locator = Locator(by=By.CSS_SELECTOR, value=".example > h3")
        return BaseElement(
            driver=self.driver,
            locator=locator
        )
Creating the Test
Time to implement the AB_TESTING page’s class in our test!
We need to first import the AB_TESTING class, then we call it by also passing the webdriver to be used by our BasePage and BaseElement classes too, and finally we use the functions to go to the URL, next to click on the ab_testing_link, and finally to retrieve the text from header, as with any test we need to add an assert, we assert that the text in the header matches ( this test could randomly fails, due to the logic is set to randomly change the string).
from pages.ab_testing import AB_TESTING

def test_home_page_loaded(browser):

    training_page = AB_TESTING(driver=browser)
    training_page.go()
    training_page.ab_testing_link.click()
    header_text = training_page.ab_testing_header.text
    assert "A/B Test Control" in header_text
We can now see the benefits of using POM design, our code is now more readable and the usability sky rocket! 🚀
To run all the test we use the command:
pytest --browser chrome
Thank you for getting this far in this blog post, please check the code in the link: Pytest Selenium GH Project